
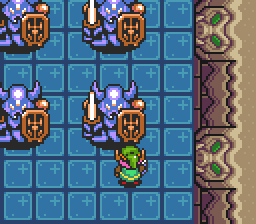
Ganon's Tower Ice Armos
As with the Armos Knights fight in Eastern Palace, each Armos Knight takes 3 arrows to kill so bow strats are the most common way to handle this fight. Several different strategies are possible -- some example are given below.
As with before, most "quick kill" strategies attempt to defeat the final two Armos Knights in quick succession in order to skip phase two of the fight.
The most common way to approach the fight is to start at the bottom-right (adjusting Link's position upward after falling into the pit) and then move upward and then left to finish the fight near the north door.
The fight starts with some number of arrows fired upwards -- 2 is optimal but difficult, 4 is slower but may be an easier pattern to remember/execute, and 3 strikes a middle ground.
After the initial 6 arrows are fired (4 upward, 4 leftward, in some order), it's vital to delay the 7th arrow show until the bottom Armos Knight has returned to its original position, which will trigger the next rotation pattern. If the 7th arrow hits before this, the rotation will not begin and you'll lose time waiting.
This image shows the highest vertical coordinate (039F) where Link can safely stand without being hit by the initial rotation spread of the Armos Knights, assuming he falls into the pit from the right side (resulting in a horizontal coordinate of 19B0). Note that you may potentially be able to stand higher than this, depending on your exact strategy.
As with the Eastern Palace version of the fight, you'll ideally finish the fight by defeating the lower Armos Knight last (instead of in the other order), reducing arrow flight time.
For beginners, a simpler approach can also be used, disregarding the quick kill entirely and simply staying in the bottom-right corner, though this is significantly slower.
As with the Eastern Palace version of the fight, other more aggressive strategies are also possible. This one starts in the middle-right of the room (using a bonk against the bottom wall to get into position), and starts by firing 1 arrow to the right, followed by 4 downward while moving slightly right. Diagonal up-right should be held while shooting the 5th arrow, to allow for an abrupt change of direction to the northeast while firing 2 arrows upwards.
These two strategies start in the middle-right of the room and fire left first (the boots can be used to dash upward in order to get into position).
With silver arrows, each Armos Knight only takes a single hit to kill, allowing for different strategies to be used.
Starting from the bottom-right to follow the same approach as the basic silversless strategy is viable. This variant alternates arrows fired up and to the left while traveling toward the door. You'll have to manage adjusting your momentum with the d-pad in between arrow shots to get the correct trajectory.
This strategy starts in the middle-right of the Armos Knights (after bonking the bottom wall), allowing for reduced arrow travel time. It makes heavy use of momentum change ice physics, where holding a diagonal out of the arrow firing animation will cause Link to instantly change directions without having to decelerate to a stop.
This strategy starts in the middle-left and is the fastest known kill. The setup starts by bonking off the east wall -- Link's vertical position must be relatively precise to avoid being hit by the upper and lower Armos Knights. Ice momentum changes are again used to lessen arrow flight time.
As with the normal Armos fight, it's possible to defeat all 6 Armos Knights using the cane of byrna, even without any magic extensions. If the bow is not available, this is the fastest option for handling the fight, assuming you can spare the magic. Note that due to extra lag, these strats will be significantly slower if not playing on a version of the game that uses FastROM.
This strategy groups the Armos Knights in the upper-right corner after waiting for the rotation phase to start. You'll want to activate byrna after the 4th jump -- any sooner will risk not having enough magic for phase 2 of the fight. You'll also want to start moving to the left after reaching the north wall, to start hitting the second-to-last Armos Knight earlier. Be prepared to use a backup weapon in case you run out of magic.
The optimal strategy instead starts in the lower-left of the room and deals at least 3 hits to the final Armos Knight on the way to the upper-right corner, allowing you to get the quick kill by defeating it at the same time as the other remaining one. It only loses a couple of seconds compared to a well-executed bow strat.
The logical requirements for the Ice Armos fight are the same as those for the normal Armos Knights fight.
The Ice Armos fight is notable for affecting the Arc Variable value, which affects the spawn pattern of the firebats in the Ganon fight.
- The Arc Variable will be reset to 64 upon entering the fight
- The value oscillates between 64 and 192 according to scripted behavior based on fight patterns
- The script continues to run even after the fight, as long as you remain in the same supertile
- (Mirroring or changing floors will change your supertile)
- A successful Ice Armos quick kill will generally result in the value being locked at 64 by the time you open the three chests in the Big Key Room
Because this fight is often the last event that sets the Arc Variable before the Ganon fight (particularly in a No Major Glitches speedrun), runners are typically accustomed to fighting Ganon with the Arc Variable set to 64. However, it is possible to end up with a higher value, if you have a quick Ice Armos fight and mirror immediately after opening the big key chest (or if the Ice Armos fight is skipped entirely).
If exiting via the stairs in Four Torches, it's possible to reach the stairs before the value changes from 64, but whether you manage to do so or not is highly dependent on your execution.
With silvers arrows on hand, the fight is typically completed much more quickly, which usually results in the Arc Variable being set to an inconsistent value after mirroring. Keep a mental note of this for a future Ganon fight to avoid being surprised by an unfamiliar firebat spawn pattern.
If the boots are available, dashing to exit the room is preferred as the dash can be charged before the door opens. If you aren't using a dash, you'll have to be conscious of your horizontal movement, as Link won't "snap" into the door and can instead overshoot it because of ice physics.
Coming from the north and going to the west door, walking diagonally across the ice floor can be faster than even a frame-perfect sequence of two dashes, despite being trickier to execute. A pure diagonal walk will result in overshooting the door, so you must let go of down for at least a brief period of time in order to have the correct positioning and momentum to successfully snap into the door.
Because of the way ice physics work, performing sword slashes or using an item such as the hammer can help to slightly speed up Link's velocity across the ice.